24/01/2012 - VWG Magazine Feature

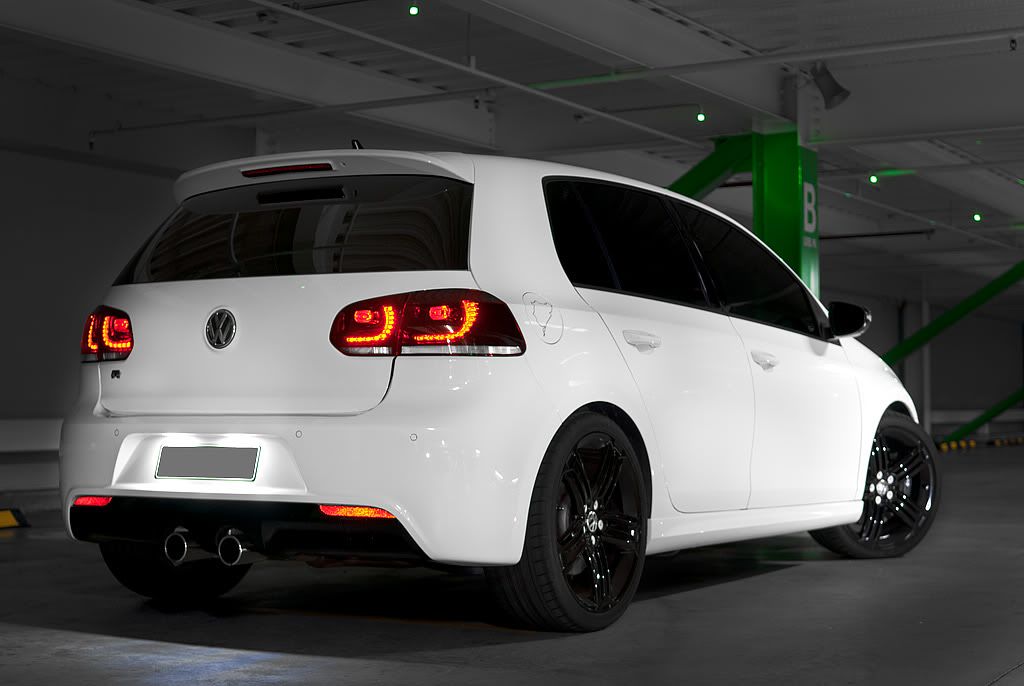
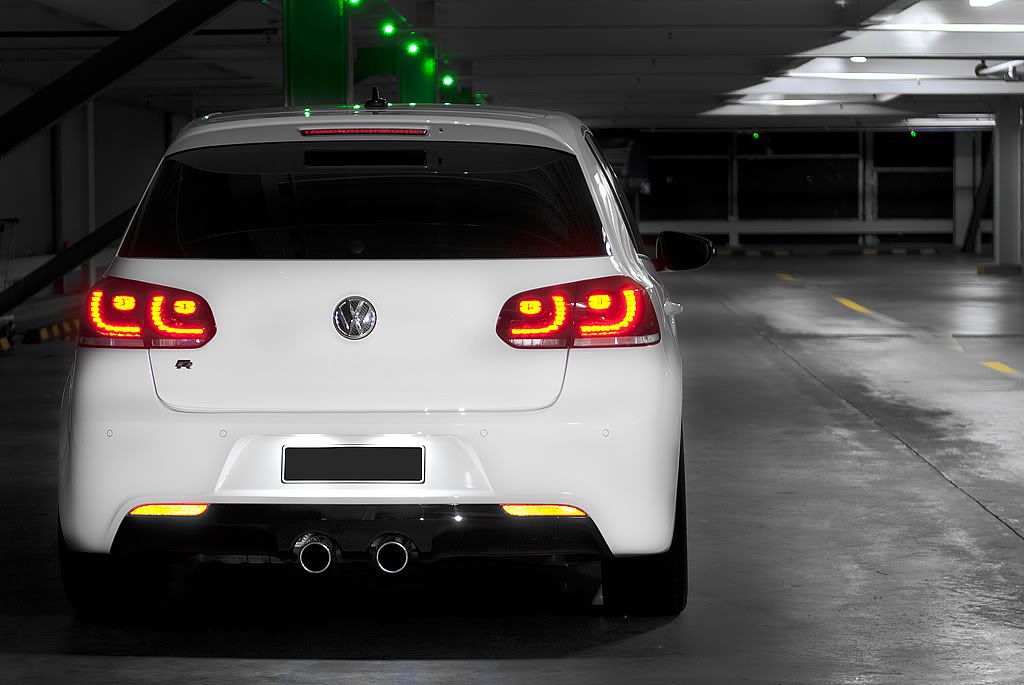
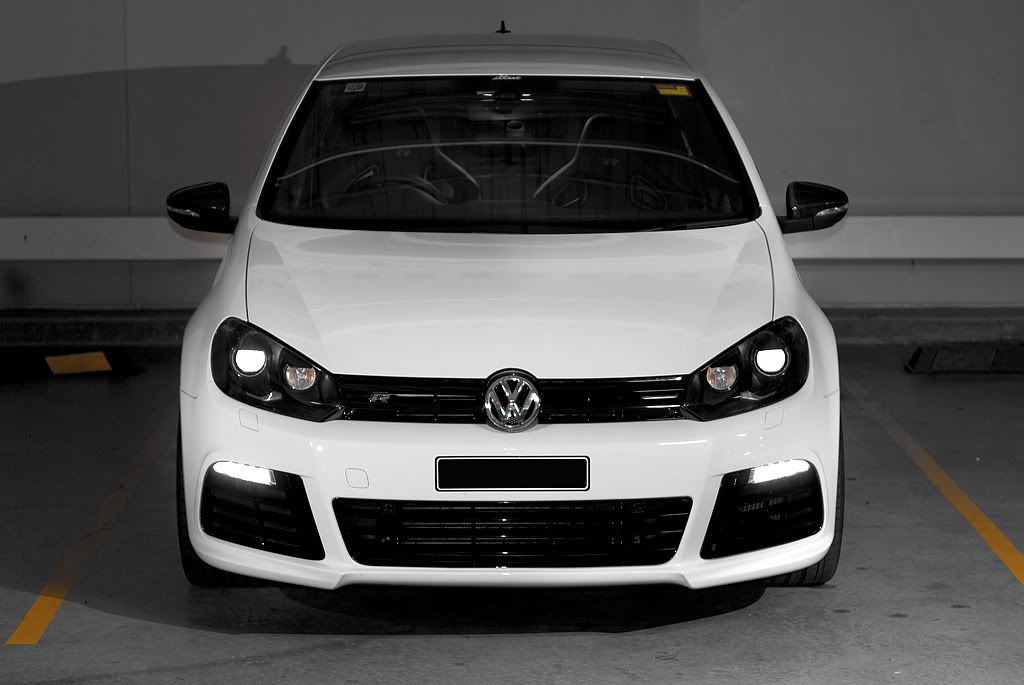
Back in November last year, VWG held a carpark meet at the Entertainment Quarter in Moore Park which I documented in one of my entries here and this meet was also attended by a few photographers from Fast Fours & Rotaries magazine. Well, the magazine should be out very soon at newsagents nationwide in the coming weeks, but Justin was able to get his hands on an early copy and from the teaser photos he sent me, I saw that my car made the cover spread! It's not a feature or anything but I'm still pretty happy that it made it in there, although I admit it's not a magazine I'd ever normally buy. The only other time that I saw one my car in a magazine was when I entered into Autosalon Final Battle back in 2006 with my Accord Euro. It made it into the Autosalon magazine (now defunct) as one of the pictures for when they were recapping the Sydney show.

Even though it's not a magazine I normally purchase, I'll be buying this months copy. In fact, I've already ordered it online and it should be in my hands by this coming Friday. Anyways, here are the teaser photos, courtesy of Justin Fox. 


Fast Fours & Rotaries : February 2012.
Pretty keen to read that feature on the AE86 with VTEC. F20C from S2000 I'm guessing.


The cover spread with the squaring off picture with my Golf R and Tendy's Scirocco R. Nice!!


It was mainly a MK6 affair, but a few cars stole the limelight. Christina's MKV R32 with airbags 
and Work Meisters 3pc and Devin's MKIII VR6, also with Work Meisters 2pc.


You can see the ass of Tendy's Scirocco R and a little of my Golf R, 
along with Kevin's Volks RE30's and a bit of Miles' colour coded bumper on his MKV GTI.


The club has grown exponentially in the very short amount of time that it has been operational, and it's growing at an exponential rate. Kudos to Christina and Justin and hopefully it will continue to grow in the coming years. Interested to read the article that they have written.

19/01/2012 - More That Just A Car

Well, 2012 is officially here and has been for the past 19 days. A lot of stuff has been happening like spending time with friends and loved ones amongst other things. No real update to the car yet as I'm saving up the cash that I currently have left for spending money for when I go overseas in March to the US with the boys. Should be a memorable road trip for sure and definitely looking forward to this.

Currently, I have a few parts that are waiting to be installed on the Golf R as well as some other parts that will be ordered after I get back from my month long trip; wheels and suspension to say the least. You'll just have to wait and see.

In the meantime though, I came across this clip on YouTube. It's about the love that one man had for his 1965 Chevy Impala SS until he was forced to sell it to pay for his son's education. Two decades later, he is re-united with his car after his two sons spent five years looking for it. I'm sure every car enthusiast can relate to the feeling that this man has for his Chevy. Remarkable story and definitely worth five minutes of your time to watch.


30/12/2011 - DIY and Photoshoot with Miles and Rex


Met up with two VWG forum members Rex and Miles. Rex had purchased my old S2TPP silver paddles from me and I had said I could give him a hand with the install. Miles, always willing to lend a helping hand, came along as well. Having done this a lot of times now myself on both my car and other members cars and with Miles having done a few himself, between us it was a very quick DIY. All in all it took about 15 minutes in total to replace the OEM paddles to the S2TPP's.

Since it was over so quick, we grabbed a quick bite to eat and decided to have a small photo session. My Golf R, Rex's MK6 GTI and Miles' latest aquisition : Suzuki SV650S, which is a 650cc bike, but learner legal! Note : get bike licence ASAP!

A small recap from the night. Photography by Rex Abergas.


The meetup location.


Removing the OEM paddles...


...and replacing them with S2TPP goodness. Miles fitting up the new paddles.


Putting everything back together.


Much better. The silver paddles really accentuate the other silver bits and bobs on the GTI.


Never get sick of looking at the rear lights.


Side on profile.


Rex's Tornado Red MK6 GTI. I'd never consider getting a red car but the GTI is one car I would love to have in red. It just pops.


Love the look of Miles' bike in this photo.


It was hard trying to get the position right for this one.


Saved the best for last. My favourite shot of the night.

18/12/2011 - Small Update

Just one decent photo taken from my recent trip to the Hunter Valley wine region.


Location of this estate was made famous by the reality TV show : "Farmer Want's a Wife." 


And just the other day...


20,000 kms travelled since 1st December 2010. A little over a year and still going strong!

09/12/2011 - 1 Year Anniversary Photoshoot By Kevin Gou

Met up with an old friend of mine tonight, whom I haven't seen in a while. It's been so long since I've met up with Kevin and I think the last time we hung out was at my 21st birthday party back in 2006. We first met at one of the cruises/meets when I had my old Accord Euro and when I was frequenting the Honda scene. We instantly connected and would meet up on occasion along with his other friends (who were also into Honda's at the time, aptly naming themselves "Team West"). After a while though, we lost contact as I went travelling for a year and a bit and finished off my studies but still kept in pseudo-contact somewhat via Facebook. He was the photographer at many of the meets I attended and his photos were always fantastic. How time flies. He's now a photographer for carsales.com.au, taking photos of cars at dealerships and recently he's put down a deposit for a Golf R of his own. A United Gray model five door with DSG transmission and he ticked basically every single factory options available except for the Recaro seats. One thing you have to know about Kev is that he's tall and for an Asian to be like 6'5 or something, it earned him nicknames like "Big Kev" and "Yao", after the NBA star Yao Ming. Since the Recaro seats didn't have much adjustability apart from being able to move back and forth and recline manually using the recliner wheel, it wasn't suitable for his needs. The car though will be delivered in August next year 2012 which is the only let down. A keen car enthusiast who much like myself hates waiting for anything has already started buying mods for his future car and is frequenting the forums as well, getting ideas from members who currently own a Golf R.

His current car, a BMW 330i which he has tastefully modded, will be going for sale no doubt once he takes delivery of his new car.


Kev's current ride : BMW E46 330i. Notice the CSL front bumper, subtle matte black grilles and
19" VMR Racing V713 wheels. Also has a CSL carbon rear boot as well as a host of other goodies.


Again, it's amazing how quickly times flies. It's already been one year since I've taken delivery of my car. To mark the occasion, I asked Kev if he was willing to take a few photos of my car and he very generously accepted. Initially, we went to Homebush but there were no carparks that had decent lighting so we ended up at the Rhodes Ikea carpark, a place where many a OzHonda meet has taken place in the past.


I thought it would also be a good idea to list the modifications which has been done to the Golf R so far after one year. So as at 9th December 2011, these are the current modifications on the Golf R. Photography courtesy of Kevin Gou.


ENGINE + PERFORMANCE

- GIAC ECU Reflash (Stage 1)
- VWRacing Cold Air Intake
- EVOMS Heatshield (Ceramic Coated Wrinkle Black)
- 42 Draft Design Oil Catch Can
- Audi RS4 Fuel Pressure Valve


EXTERIOR

- OptiCoat Paint Protection Sealant
- Nanolex Wheel Protection Sealant
- Nanolex Glass Sealant
- Lamin-X Clear Protective Film (Headlamps, DRL)
- ECS Hatch Pop Gas Struts
- PySpeed White LED Licence Plate Lights (No Error)
- JCaps Billet Oil Cap
- JCaps Billet Coolant Cap
- JCaps Billet Dipstick Cover
- JCaps Billet Washer Fluid Cap
- OSIR Mirror Covers (Carbon Fibre)
- Audi TT-S OEM Engine Cover (Candy White with Gloss Black Accent)
- Battery Cover (Candy White with Gloss Black Accent)
- Fuse Box Cover (Candy White with Gloss Black Accents)
- Rear VW Badge CF Inserts (Carbon Fibre)
- Euro Plate Holder Delete
- 5% Black Window Tint
- Rear Wiper Delete with Honda OEM Wiper Delete Metal Plug


INTERIOR

- White LED Interior Light Full Replacement Units
- Custom Gloss Black Interior Trim
- JCaps Billet Seat Recliner Wheel Cover
- S2TPP Paddle Shifter Extensions
- Engraved "R" and "Eject" LED Dead Buttons
- Engraved "Garage Button" LED Push Button Mod
- OSIR O-Rest Dead Pedal
- OSIR O-Pod Mono (Gloss Black)
- OSIR O-Pod Dual (Carbon Fibre)
- OSIR Step-GT Door Sill Trim (Carbon Fibre)
- DEFI Advance BF Control Unit
- DEFI Advance BF 2.0 Bar Boost Gauge (White, 60mm)
- DEFI Advance BF Oil Pressure Gauge (White, 60mm)
- DEFI Advance BF Exhaust Gas Temp Gauge (White, 60mm)


WHEELS + SUSPENSION

- UniBrace UB Chassis Brace
- Whiteline Anti-Lift Kit
- VWRacing Lower Engine Mount
- H&R Front Sway Bar (24mm : Hard Setting)
- H&R Rear Sway Bar (26mm : Hard Setting)


29/11/2011 - Audi TT-S Engine Cover (Part 2 of 2)

As per my previous entry here, I had received my Audi TT-S engine cover and it was professionally painted by Frank in gloss white with gloss piano black inserts. I told him that he could paint the top part insert with the Audi rings and the TFSI lettering all in gloss black. Ideally, I would have liked the rings and the letters to be done in gloss white to match the engine cover but due to time constraints and with Frank having to tend to other matters regarding other customers cars I said it was okay for him to just paint it in black because I didn't want to hold him up for any work just for my engine cover. The final finish was excellent but I still wanted the rings and lettering in white. Thus, I decided to do a bit of DIY.

After a short trip to AutoBarn, I picked up a few things which I would need to complete my task. They were:

  • VHT gloss clear coat engine enamel
  • VHT gloss white engine enamel
  • K&H primer
  • 500, 800 and 1500 grit sandpaper
  • Masking tape

I chose the VHT engine enamel mainly due to the fact that it can withstand the heat created in the engine bay. According to the can, it can withstand up to 288 degrees celsius of heat and although the enamel is not meant to be applied on plastic such as the engine cover, it should be okay and should hold up. The K&H primer was the only can of primer I could find that AutoBarn had in stock. I've never heard of them before but really, any can of primer would do. This was mainly to get the enamel to stick onto the primer. The sandpaper was there to rub back the gloss black on the Audi rings and the letterings before applying the primer and to also use it after the primer was applied and dried to rub back any imperfections before applying the paint to ensure a smooth and consistent finish. 


What was purchased at AutoBarn. Engine enamel, primer, masking tape and sand paper.


The first thing to do was to mask the areas on the insert where I didn't want the paint to be applied. The large sections were okay the really difficult parts were getting in between the little spaces between the Audi rings and also the tiny spacing left by some of the letters. This took quite a long time but I wanted to do it right. Remember, your final result is only as good as your prep work. I used scissors and a small Stanley knife to cut the shapes needed to fill the strange gaps and used tweezers to apply them as this would mean that the masking tape would adhere to the surface a lot better than if I had handled them with my fingers and got my fingerprints all over the adhesive surface of the masking tape.


Preparing the insert by covering off the areas which aren't to be painted.


All masked up and ready.


Next, it was to sand back the gloss black paint on the rings and the letters. I used warm water and used the 500 grit sandpaper first. The lower the grit number on sandpaper, the coarser the sandpaper is. I tried to sand it back as much as I could and tried all sorts of ways to get into those harder to reach places on the rings and the letters. Then I used some 800 grit sandpaper to give it a smoother finish. It was now ready for primer. I applied five coats of primer, waiting ten minutes between each coat and using light coats each time with the can approximately 20-30cm away from the insert. By applying light coats, this prevents any runs and ensures a more consistent finish. I let it rest for two day before I started to sand back the primer to make it ready for paint.


Five coats of primer and sanded back for a smooth surface for the paint to stick.


Then it was time for paint. Again, the same technique was used when applying the primer. Light coats and waiting approximately ten minutes between each coat. I had applied five coats and one medium coat of gloss white engine enamel and let it cure for another two days before working on it again. Finally I applied three light coats and one medium coat of gloss clear enamel to bring out the shine. Again, I let it rest for two full days before handling. 


Five light coats + one medium coat of gloss white.
Three light coats + one medium coat of gloss clear.


Now this next part was the hard part. Because the paint was now applied over the area, the whole paintjob was one smooth finish. I was scared that if I peeled back the masking tape, it would also peel away at the Audi rings and the TFSI logo. To ensure that didn't happen, I got my small Stanley knife and carefully cut around the edges of the rings and the letterings. This process alone took about 30 minutes because it needed to be done carefully, otherwise the paint will just peel off the rings and the lettering and all that work will have been for nothing. Once it was cut, I would then use a tweezer to peel back the masking tape and also to get rid of any other remaining masking tape residue in those hard to reach places. 


Peeling away the masking tape. You can see the Stanley knife I had to use to cut around the rings and letters.


I cleaned up the residue left on the rings and cut away at imperfections around the rings and letters and here is the final result.


Result. Looks pretty good for a DIY job if I do say so myself!


What the engine cover looks like now. Success!


This whole exercise took just under a week but all in all, it turned out a lot better than I expected. Preparing the engine cover for the primer and paint was the more time consuming but the end results speak for itself. The white from the enamel is only a touch "brighter" than the gloss white of the engine cover but thats only if you go up real close and inspect it. From normal distance though, it looks fantastic and to me, it now looks complete. I will be testing the mounting points soon to see if the engine cover can fit nicely over the oil catch can hoses I have without fouling anything. If it doesn't sit nicely, then I will need to cut a section off the front portion of the engine cover to accomodate the hoses but hope it doesn't have to come to that. Will update again with photos once the engine cover is sitting nice and snug in the engine bay.

21/11/2011 - Rear Windscreen Wiper Delete

As you may recall from my previous post, I decided to delete the rear wiper and plug the hole using a glass grommet which I had purchased from GeCleant. After paying $40.00 for it, it didn't fit even though it guaranteed perfect fitment so I looked for an alternative. I had temporarily fitted a rubber grommet that I bought from Clark Rubber thanks to Ray's suggestion and it was a perfect fit. However, the only gripe I had with the grommet was that if you pushed the grommet hard enough, it could pop out and you could push it into the dark crevices of the boot trim (which is a bitch to get off). Even if you had applied some sort of silicone or super glue to make it stay in place, you could still push it in with enough force. Of course, you hope that no one does but then again you also hope no one keys your car. So therefore, I decided to use the OEM Honda metal wiper plug instead that Justin had used previously on his GTI. These plugs fit most Honda cars that came with a rear wiper from 1989-2005, which means it includes almost all the versions of Civics, Preludes and Integras, as well as CRX's and CR-V's. I was going to buy the plug from JDMYard but after a quick look on eBay, I found someone selling not only the OEM Honda rear wiper plug, but also the OEM components which would be needed to properly plug and seal the hole left by the rear wiper. After paying $22.00 including shipping to Australia from the US, and waiting approximately 1 week, this is what arrived.


OEM Honda metal plug, the rubber grommet, rubber spacer and the 10mm M6 bolt.


OEM Honda Metal Plug : 90301-SR3-000
OEM Honda rubber grommet : 90109-SR3-000
OEM Honda rubber spacer : 90105-SR3-000
OEM Honda 10mm M6 bolt : 93402-0601200


I thought that since the plug came with the components already, I wouldn't need to go and buy a spacer or stem top cap. At the end of the day though, the other three components did not fit as the hole left by the rear wiper is bigger than the rubber grommet so I couldn't utilise them. So, using Justin's DIY guide as shown here, I went on eBay again and bought a carbon fibre stem top cap and spacer made for a mountain bike by a company called OMNI. $20.00 and another week and a half later, it arrived today. Since it didn't come with the bolt and the 10mm M6 bolt from Honda was too short, I had to drop by Bunnings to buy a longer M6 bolt. I bought a 15mm and a 25mm bolt just in case the 15mm was too short. I also bought some rubber washers from Clark Rubber and cut them to fit. 


OMNI carbon fibre stem top cap.


OMNI carbon fibre spacer. It came with a 5mm, 10mm and 15mm spacer.
I used the 15mm one for my application.


Various lengths of M6 bolts. 15mm, 25mm and 30mm. I ended up using the 25mm bolt.


Installing the plug wasn't too difficult as I just followed the DIY Justin had written. It was all a pretty straight forward install and because I kept the plastic boot lid trim off from the DIY day, it made the job easier and quicker too. Because the shape of the bolt head was a hexagon and it didnt sit flush with the stem top cap, I had to use a socket wrench and a 10mm socket to make sure it threaded into the metal plug nicely and stayed tight. You have to hold and press down hard on the metal grommet when threading in the bolt, otherwise when you try and screw the bolt in clockwise to tighten it, the metal plug will move also, thus a bit of pressure is needed to make sure the plug stays in place as you are threading it in. Apart from that, the install was a success.


Socket wrench with 10mm socket to thread the bolt into the metal plug to make sure the plug stays firm and tight.


Result. You can just see the black rubber washer being pushed against the windshield by the spacer.


Installed! 


Nice, clean and no leaks!


Pretty happy with how it looks now and finally, the rear boot lid trim can go back on! I liked the size of the Clark Rubber grommet though, it was nice and small. The OEM Honda one is a little bigger but having said that, it's made from metal, there's no leaks, and personally I do think it looks good.

There are a few more aesthetic mods I would like to do before I can say I'm  happy with it (e.g gloss black roof, new wheels, subtle body modifications, etc) but slowly but surely it's getting there. I think personally I'll hold off on the power mods for as long as I can until the guys in the US get their Golf R's in January/February 2012 as from that point forward we can expect a lot of parts becoming available for the Golf R from the good old US of A. Performance wise, the car has a GIAC Stage 1 tune with a VW Racing cold air intake at the moment, but I will be adding a front mount intercooler, high pressure fuel pump, discharge pipes, actuator and a full turboback exhaust later on too. Will probably opt for a custom ECU reflash tune once the power mods are finished.